
Turning an empty lot into a home is an exciting, but complex process. It follows a highly structured sequence, with every step building upon the one before it. Understanding this order of operations is the key to a smooth and successful project. This guide offers a complete, step-by-step look at the entire home-building process. We detail each major phase so you know exactly what to expect. If you’re looking for a straightforward, no-fluff guide to building a house for beginners, you’ve found it.
Understanding these steps and getting to know how a home is built is essential if you want to build a home for yourself. Learning about the process helps you understand what you’re getting into and what to expect. It can even improve your decision-making along the way.
This guide covers all the steps to building a house, starting with the bare lot and ending with a completed home. Keep reading to follow the journey.
This is for informational purposes - always check with your permitted authority or regulatory body first.
Table of content
How to build a house: a beginner’s guide
Before You Break Ground: Pre-Construction Planning
Long before the first shovel hits the dirt, the most critical work on your new home begins. This pre-construction phase is all about planning, and it’s where your vision starts to take shape on paper and in spreadsheets. Getting these details right from the start saves you from costly headaches and delays down the road. Think of it as creating the roadmap that will guide every decision you make, from pouring the foundation to choosing the paint colors. This is your chance to align your dreams with your budget and build a solid foundation for the entire project.
Setting Your Budget and Securing Financing
First things first: let's talk money. Before you fall in love with a piece of land or a specific house design, you need a realistic budget. Start by meeting with lenders to get pre-approved for a construction loan. This will give you a clear picture of what you can afford to spend. A good rule of thumb is to set aside a contingency fund of about 15-20% of your total budget for unexpected costs—because they will happen. This financial cushion ensures that a surprise expense doesn't derail your entire project, giving you peace of mind as you move forward with the build.
Finding and Buying the Right Piece of Land
Once you know your budget, the hunt for the perfect piece of land can begin. But finding a great lot is about more than just a pretty view. You need to do your homework before you sign on the dotted line. Key considerations include zoning regulations, which dictate what you can build, and the availability of utilities like water, sewer, and electricity. Connecting to public utilities can be expensive, and if they aren't available, you'll need to budget for a well and septic system. Don't forget to investigate the land itself with soil tests to ensure it can support your home's foundation.
Performing Due Diligence
Due diligence is your safety net. This is the phase where you confirm you can actually build your dream home on your chosen lot. It involves a deep dive into local building codes, property line setbacks, and any easements that might restrict where you can build. Getting a professional site plan early in the process is a game-changer here. It provides a clear, scaled drawing of your property, showing the proposed location of your house and other features. This document is essential for discussions with your local planning department and helps you visualize the final layout, ensuring your plans are feasible before you invest any further.
Designing Your Dream Home
This is where your vision truly comes to life. Working with an architect or a home designer, you’ll translate all your ideas, magazine clippings, and Pinterest boards into a set of detailed blueprints. These plans are the instruction manual for your builder, outlining everything from the overall shape and size of the house to the placement of every wall, window, and door. Be prepared for a lot of back-and-forth as you refine the design to perfectly match your lifestyle and budget. This collaborative process ensures the final layout is both beautiful and functional for your family.
Understanding Your Options: Tract vs. Custom Homes
When designing your home, you generally have two paths: tract or custom. A tract home is built by a developer who offers a limited selection of floor plans and finishes within a larger community. This option is often more affordable and streamlined. A custom home, on the other hand, is a one-of-a-kind house designed specifically for you and your property. While it offers complete creative freedom, it also requires more of your time and involvement and typically comes with a higher price tag. Understanding the pros and cons of each will help you decide which route is the best fit for your budget and vision.
Assembling Your Build Team
Building a house is a team effort, and you’re the team captain. Your most important player is the general contractor (GC), who will oversee the entire project, from hiring subcontractors to managing schedules and inspections. Alternatively, you could act as your own GC, hiring individual tradespeople for concrete, framing, plumbing, and more. While managing the project yourself can save money, it’s a massive time commitment and requires significant industry knowledge. For most people, hiring a reputable GC is the best way to ensure the project runs smoothly and stays on track.
How to Hire a General Contractor
Choosing the right general contractor is one of the most important decisions you'll make. Start by asking for recommendations from friends, family, or your architect. Once you have a shortlist, do your homework. Check their licenses and insurance, and ask for a portfolio of their past work and a list of references you can call. It's wise to get detailed bids from at least three different contractors to compare costs and timelines. Look for a professional who communicates clearly, understands your vision, and who you feel comfortable working closely with for the next several months.
A Realistic Look at Home-Building Costs
Understanding where your money is going is essential for keeping your home-building project on budget. Costs can be broken down into several major phases, each with its own set of expenses. From the heavy machinery needed for site prep to the final coat of paint, every stage has a price tag. Having a clear breakdown helps you track spending, make informed decisions about materials and finishes, and anticipate major payments. Let’s walk through some of the key costs you can expect during the construction process so you can plan accordingly and avoid surprises.
Cost Breakdowns by Construction Phase
Your total construction cost is the sum of many smaller parts. The process starts with site work and foundation, followed by framing, which creates the home's skeleton. After that comes the installation of major systems like plumbing, electrical, and HVAC. The exterior is then finished with siding and roofing before the interior work begins with insulation and drywall. The final stages involve installing finishes like flooring, cabinets, and countertops, as well as painting and landscaping. Each of these phases involves different materials and specialized labor, all contributing to the final cost.
Foundation
The foundation is literally the base of your home, and it’s one of the first major expenses you'll encounter. This phase includes excavating the land, pouring concrete footings, and constructing the foundation walls or slab. On average, a foundation can cost around $10,000, but this figure can vary widely depending on the size of your home, the type of foundation (slab, crawl space, or basement), and the condition of your soil. It’s a critical step where you don’t want to cut corners, as a solid foundation is essential for the structural integrity of your entire house.
Framing
Framing is when your house starts to look like a house. During this phase, the floors, walls, and roof structure are built, creating the home's "skeleton." This is often one of the most exciting parts of the build, as the structure goes up relatively quickly. The cost of framing includes both lumber and labor and is a significant portion of your overall budget. The complexity of your home's design, such as the number of corners and the pitch of the roof, will directly impact the final framing cost.
Rough Plumbing and HVAC
Once the frame is up, it's time to install the systems that will run behind the walls. This is known as the "rough-in" phase. Plumbers will run pipes for water supply and sewer lines throughout the house, and HVAC technicians will install the ductwork for your heating and cooling systems. Electricians will also be on-site running wires for outlets, switches, and fixtures. Getting these systems installed correctly is crucial before the drywall goes up, as making changes later is much more difficult and expensive.
Insulation
After the rough-ins are complete and have passed inspection, the next step is insulation. Proper insulation is key to your home's energy efficiency and overall comfort, keeping it warm in the winter and cool in the summer. It's installed in all exterior walls, ceilings, and floors. There are several types of insulation to choose from, including fiberglass batts, blown-in cellulose, and spray foam, each with different performance levels and price points. Your builder can help you choose the best option for your climate and budget.
Factoring in Permit Costs
Before any construction can begin, you need permission from your local municipality in the form of building permits. These permits ensure that your project complies with local zoning laws, building codes, and safety standards. The cost of permits can range from $1,000 to $3,000 or more, depending on your location and the scope of your project. The permit application process typically requires submitting detailed blueprints and a site plan. Providing clear, professional documents can help streamline the approval process, which is why many builders and homeowners use services like My Site Plan to get the necessary drawings quickly and efficiently.
How Material Choices Impact Your Budget
The materials and finishes you choose for your home will have a massive impact on your final cost. This is where you have the most control over your budget. From flooring and countertops to siding and windows, there is a wide range of options available at nearly every price point. While it can be tempting to go for high-end finishes everywhere, being strategic about where you splurge and where you save can help you stay on budget without sacrificing style. Prioritize what's most important to you and explore different materials to find the right balance of quality, aesthetics, and cost.
Countertops
Kitchen and bathroom countertops are a perfect example of how material choices affect your budget. On the lower end, laminate countertops are an affordable and durable option available in countless colors and patterns. Mid-range choices like solid surface or granite offer a more upscale look and better durability. At the high end, materials like quartz and marble provide a luxurious finish but come with a premium price tag. Your choice will depend on your budget, style preferences, and how you plan to use the space.
Siding
The siding you choose determines your home's curb appeal and its first line of defense against the elements. Vinyl siding is one of the most popular and budget-friendly options, offering low maintenance and a wide variety of colors. For a more traditional look, wood siding is beautiful but requires regular painting or staining. Fiber cement siding offers the look of wood with greater durability and less maintenance, though it comes at a higher initial cost. Each option presents a different balance of aesthetics, durability, maintenance, and price.
Common "Budget Busters" to Watch For
Even with careful planning, it's easy for a budget to get off track. Some of the most common "budget busters" include extensive site work for a difficult lot, an overly complex layout, and a desire for high-end finishes throughout the house. According to experts, other fast ways to go over budget are elaborate porches and rooflines and simply having expectations that don't align with your funds. Making changes after construction has started is another major culprit, as it can lead to additional material and labor costs. Sticking to your original plan as much as possible is the best way to keep your finances in check.
What a $100,000 Budget Can Build
It's important to have realistic expectations about what your money can buy. So, what can a $100,000 construction budget get you? If you already own the land, you might be able to build a small home or barndominium, likely in the range of 800 to 1,000 square feet. This would require you to choose standard, budget-friendly materials and finishes and potentially handle some of the work yourself. This figure generally covers the structure itself and basic finishes but doesn't include the cost of the land, septic systems, or bringing utilities to the site, which are all significant additional expenses to consider.
1. Site preparation and foundation
A solid home starts with a good site and foundation. These things lie at the very base of the home. So they impact everything that comes after.
Preparing the site legally
Most of the time, building a home doesn't start with the sound of hammers swinging and the sight of shovels breaking dirt. The process starts long before then, when home builders dive into the legalities of building a house.
One important element of this involves dealing with permits. A builder needs to apply for permits when doing almost any kind of work on a property. This is done to ensure that any construction work adheres to legal standards.
Preparing the site physically
Once everything is good to go on the legal end of things, the property itself can be prepared. Usually, builders start by leveling the site. This typically includes removing anything in the way of the building. It may also include digging into the ground to make room for the foundation and the septic system.
Building the foundation
A building's foundation starts as a series of wood frames. Then, builders install footings using a sturdy construction of concrete and rebar. All of this is laid, poured, built, and then left to cure for a period of time.
During this step in the process, a few other issues are taken care of. If the home has a basement, its walls will be constructed. Plus, the waterproofing and plumbing are integrated into the building.
First inspection
After everything else in this step is done, the first inspection can take place. During this inspection, a government worker visits the property and examines the foundation. They ensure that everything has been done properly and that you can move onto the next step in the house-building process.
How long does this step take?
When building your own home, the first step is typically one of the longest. That’s because it takes a lot of time to dig foundations. Then, it takes even more time for the foundation to set. This, along with all of the other necessary work, means this step can last well over a month. Timings may vary based on the builder’s capabilities and the type of foundation you choose.

What Are The Steps To Renovating A House?

Everything You Need To Know About House Foundations
2. Framing
If you've ever passed by a building that looks more like a series of pillars and slats than an actual building, you've seen a house in the framing phase. At this point, builders create the building's core, upon which most other features will rely.
The frame goes up
The framing process starts by creating the system for the floor, the walls, and the roof. In most cases, this involves setting up a series of boards that sit where the floor, walls, and roof will eventually go.
The sheathing goes on
The frame is then covered (in some areas) with sheathing. The sheathing is designed to protect the frame from outside elements, like rain. However, it’s also designed to allow water that has made its way inside to escape.
This sheathing goes on the outward-facing pieces of the frame. So, in most cases, it covers the exterior walls and the home's roof.
At this point, builders will also put in the windows and exterior doors.
How long does this step take?
This is another lengthy step. It involves a lot of physical labor that, often, can’t be done all at once. This is especially true in multi-story homes, where work on the second floor can only start once the first floor is complete.
Because of this, it can take a month or two to finish this step. The biggest influencing factor is the size and complexity of the house. Smaller, less-complex homes will take less time to build than their larger and more complex counterparts.
3. Home systems are installed
A home isn't just a series of boards and construction materials. It also needs power, water, and other comforts in order to be practical. And that’s what your contractors will tackle during this next home-building step.
The systems
Most homes have a multitude of systems. On any build, home systems like pipes, water lines, sewer lines, electrical wiring, ductwork, vents, and more, have to be installed. These systems have features, like electrical outlets and showers, that need installing, too.
Additional inspections
At this point in the process, there’s a lot going on with the house. So, more inspections need to take place. Specifically, inspectors will want to look at the framing, the plumbing, and the electrical system. This will happen in a similar way to the first inspection.
How long does this step take?
Installing all of the home's systems can take just a few weeks. However, you need to factor in extra time for inspections. To avoid delays to the build, these inspections should be scheduled in advance.
4. The house is insulated
To prevent residents getting too hot in summer and too cold in winter, the next step in building a house is insulation. Effective insulation makes a house much more comfortable. And it can be the difference between a low and a sky-high energy bill.
How you go about insulation will depend on the home, the builder, and even the climate and location of the house. There are a wide variety of insulation types out there and different types are used in different jobs. But the most common types of insulation include fiberglass, cellulose, and foam.
No matter which insulation you choose, builders will install it into the home's exterior walls and attic. They will also insulate the walls, floors, or ceilings that separate an insulated area of the home from an uninsulated area of the home. This can happen, for example, if an uninsulated crawl space shares a wall with one of the rooms in your house.
How long does this step take?
This is one of the shorter steps in the process. It can be finished in as little as a week. However, you may like to budget for two. Again, this is heavily dependent on the size of the home and the complexity of the build. It also depends on the type of insulation you want to use.
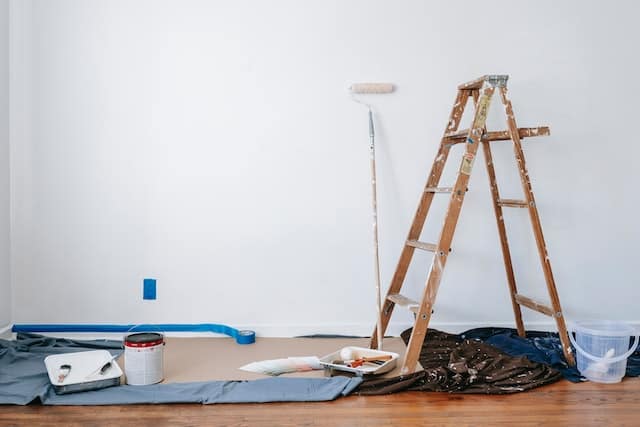
5. Drywall, fixtures, and finishes
At this point in the process, the house is starting to look less like a construction project and more like a home.
Drywall
Once the drywall is hung, you’ll really start to feel like your home is coming together. Drywall covers up the boards and turns them into regular walls. After drywall is hung, your contractors will give it a primer paint coat.
External finishes
Builders apply external finishes at this point, too. They use things like siding, brick, or stone to complete the outside of your home. These materials play a big part in the overall feel of a house. A brick house has a very different look when compared to a house with siding.
Understanding your options and knowing what you want is a critical step when you build your own home. l feel of the house's exterior. A brick house has a very different appeal from a house with siding. Understanding this and knowing what you want is critical in this step in the process.
How long does this step take?
In a small home, this step might only take a few days. However, it can take up to two weeks in larger homes.
6. Interior trim and exterior fixtures
Now that the home is coming together, big projects will continue. But it’s also time for some smaller details.
Interior trim
Many interior elements, both decorative and functional, are installed at this point. This includes things like interior doors, door casings, moldings, baseboards, and balusters. Walls are painted or wallpapered for a final time. And any other decorative elements are also painted at this point.
Exterior features
Outside, you can expect to see some new features, too. The most obvious of these is the driveway, typically an asphalt driveway.
This driveway may have been poured earlier in the process. However, many builders choose to wait until this point so that the driveway isn't damaged by heavy pieces of machinery entering and exiting the property. Contractors will install patios, walkways, and any other hardscaping at this point, too.
How long does this step take?
When you build a home, fitting interior trim and exterior fixtures is one of the longer steps in the process. This is because many of the tasks in this step involve some waiting around.
For example, when painting a home, you need to wait for the paint to finish drying. And while laying a driveway, you have to wait for the asphalt to set. So this step takes, on average, between one to two months.
7. Flooring and countertops on the inside and grading on the outside
During this stage in the process, some of the more delicate house details are installed. Meanwhile, the outside is treated to some finishing touches.
Flooring and countertops
Flooring and countertops can be delicate. Because of this, they’re usually saved until this late point in the process, when heavy equipment and fixtures are no longer being dragged through the house. This prevents the flooring from being scratched and the countertops from being chipped or shattered.
Exterior grading
With the driveway and other major hardscape features done, there’s not much left to do outside. So at this point, contractors can do the exterior grading. This grading finalizes what the land around the house will be like and it’s important for both practical and aesthetic purposes.
From a practical standpoint, the exterior grading helps make the area functional. The grading is a critical part of yard drainage. Contractors will create slopes that allow water to run where it needs to go. When planned properly, this prevents water from pooling in areas it shouldn’t.
From an aesthetic standpoint, the exterior grading is the foundation for future landscaping. It helps make flower beds or other areas of vegetation possible. Because of this, it’s helpful to have an idea of what you want the landscaping to look like before getting started with this step.
How long does this step take?
If properly executed, this step shouldn't take too long, a few days at most. Flooring and grading can both be finished in less than a week. And installing countertops doesn't take long at all.

15 Exterior Home Remodeling and Renovation Ideas

I Want To Renovate My House: Where Do I Start?
8. Mechanical trim and bathroom fixtures
This step includes more of those exciting finishing touches. Contractors will install mechanical trim and bathroom fixtures.
Mechanical trim
At this point in the home-building process, the home’s electrical system isn’t complete. So contractors will install light fixtures. They’ll also install and connect switches, put in outlets, and finish off the electrical panel.
Meanwhile, HVAC elements and equipment are also put in place. This includes things like the thermostat and registers.
Bathroom fixtures
While larger bathroom fixtures were put in earlier in the process, smaller ones are put in at this point. This includes things like sinks, faucets, toilets, and bidets. These are directly hooked into the water and sewer systems.
How long does this step take?
While this step includes fairly quick and easy jobs, these tasks start to add up. So it may take a few weeks to complete this step.
9. Decorative elements, finalizing flooring, and landscaping
This is one of the final phases of the building process. It mostly involves putting the finishing touches on things that were started earlier in the project. However, it also can include a few bigger projects.
More bathroom features
At this point, the bathrooms in the home are nearly complete. So now’s the time to add details like mirrors and shower doors.
Carpeting
Non-carpet flooring has already been installed. But you need to save carpeting until this point, to prevent any dirt or debris from being tracked through the house and onto your new flooring. Once this is done, the flooring is finalized and all of it is cleaned.
Landscaping
Outside of the house, landscaping starts. Depending on the house, this could be a relatively easy part of the process or the start of a whole new project.
In either case, there are always a few things that always get done. You or your landscaper will plant large plants like trees and shrubs. You’ll also seed the yard with grass. Even if you do nothing else, these things will provide the basis for a landscape and make the house look more inviting.
From there, landscaping can get as involved as you want it to. You can construct and fill flower beds and place other decorative features. For larger or more elaborate designs, a site plan can be of great use.
How long does this step take?
Putting in bathroom features and carpeting should only take a week. Neither of these is a complex or lengthy process.
Landscaping can take a week or more. However, this will obviously vary dramatically depending on the complexity of the landscape. A complex landscape can take much longer, to the point where it will actually continue after the rest of the home's construction is finished.
10. Final walkthrough
Now that everything is complete, all that’s left to do is take a final walkthrough. This involves walking the homeowner through the house to introduce owners to the property and give them a chance to spot any issues.
Introducing the house
Owners need to be introduced to the home because there may be things about it that they didn't understand at first. The builder will explain what is inside and outside the home and how everything works. They’ll also explain things the owner should do to keep the house running smoothly.
While being introduced to a home, paying attention and being involved is important. Ask questions if you don't understand something and feel free to ask the builder to clarify something to make sure you do understand it. Take notes if possible. Doing so will allow you to access specific information later and remind yourself about what was discussed.

Looking for problems
On this walkthrough, the owner should also be on the lookout for any issues. It’s possible that something went wrong with the building process. Perhaps something was damaged or there’s a feature that the owner simply doesn't like. This is the time to point out and talk about these issues with the builder.
In some cases, they’ll be able to fix the issue easily. They may not have realized that something was out of place or they may have misunderstood the owner's instructions. If this is the case, they’ll often go out of their way to fix the issue as quickly as possible.
This entire step in the process is important because it is necessary to catch any issues before move-in. This allows the owner to prove that the problem was caused by the builder and not by them.
For example, imagine a situation where one of the hardwood floors has a large scratch on it. If the owner brings it up during the walkthrough, the builder immediately realizes it was their fault and, therefore, that they should fix it. However, if owners wait to bring the issue up at some point after they move in, the builder has no proof that the owner didn't cause the problem and so is less likely to fix it for them.
How long does this step take?
The final walkthrough and troubleshooting shouldn't take too long. In general, it can take around a week.
However, this depends on how much work still needs to be done. If many things need to be addressed, the process will take longer.
Tips for a Successful Build
Building a home is a marathon, not a sprint. Even with a great team, the process can have its share of surprises. Staying informed and proactive can make a world of difference in keeping your project on track and your stress levels in check. A successful build is all about smart planning, clear communication, and knowing what to expect. These tips will help you prepare for the journey ahead, from handling unexpected hiccups to making choices you’ll be happy with for years to come. Think of this as your friendly guide to navigating the construction process with confidence.
How to Handle Common Delays
No matter how perfectly you plan, delays are a common part of any construction project. Understanding the potential roadblocks can help you manage your expectations and timeline. For instance, bad weather can stop construction in its tracks, especially during foundation and framing work. Material availability can also cause significant hold-ups, as supply chain issues can affect everything from lumber to light fixtures. Finally, delays in municipal inspections can hold up the project at critical stages. The best way to handle these is to build a buffer into your schedule from the start and maintain open communication with your builder about any potential issues they see on the horizon.
The Role of an Independent Inspector
While your builder and the city will conduct their own inspections, you might want to consider hiring your own inspector for an extra set of eyes. An independent inspector works for you, providing an unbiased assessment at key phases of construction, like before the drywall goes up. These inspections are crucial for confirming that the work meets safety standards and local building codes. If you decide to go this route, it’s a good idea to tell your builder beforehand to ensure a smooth process. This small investment can provide immense peace of mind, knowing that your new home is being built to the highest standards.
Making Smart Material Choices
The materials you choose will define your home’s character and durability for decades. As New Home Source points out, "The materials play a big part in the overall feel of a house." While your builder will have their preferred suppliers, take the time to research your options for everything from siding and roofing to flooring and countertops. Consider the climate, your lifestyle, and long-term maintenance costs, not just the initial price tag. Creating mood boards and visiting showrooms can help you visualize the final look and feel confident in your decisions before the orders are placed.
Visiting Your Home During Construction
It’s incredibly exciting to watch your home take shape, and you’ll naturally want to visit the site often. However, an active construction site can be dangerous. For safety reasons, you can typically visit your home during construction, but it's usually by appointment. Coordinate with your builder to schedule regular walkthroughs at safe and convenient times. This is also a great opportunity to ask questions and get updates directly from the source. Regular, planned communication will help you stay informed and build a positive relationship with your construction team, ensuring everyone is on the same page throughout the project.
Considering a DIY Build? What Beginners Should Know
The idea of building your own home from the ground up is the ultimate dream for many. It offers complete control over the final product and a profound sense of accomplishment. However, taking on a DIY build is a monumental task that requires a specific skill set, immense dedication, and a realistic understanding of the challenges involved. Before you trade your weekends for a tool belt, it’s important to know what you’re getting into. From knowing which jobs to tackle yourself to finding ways to learn essential skills, this section will help you decide if a DIY home build is the right path for you.
What to DIY vs. What to Leave to the Pros
Even the most ambitious DIYer should know their limits. When it comes to your home, some jobs are best left to licensed professionals. It's strongly suggested to hire professionals for the most important structural and mechanical parts of the house, including the foundation, framing, electrical, and plumbing. Mistakes in these areas can be costly and dangerous. Instead, you can act as the general contractor, managing the project and the hired workers. This still gives you control over the build while ensuring the critical systems are installed correctly and up to code. You can then focus your DIY efforts on finishing work like painting, tiling, and landscaping.
How to Learn Essential Building Skills
If you’re serious about a DIY build, you’ll need to invest time in learning. Fortunately, there are more resources available than ever before to help you gain the knowledge and hands-on experience you’ll need for your project.
Recommended Online Resources
The internet is an incredible classroom for aspiring builders. You can watch free videos online to learn about virtually every aspect of home construction, from framing a wall to installing a faucet. YouTube channels hosted by experienced contractors and builders offer step-by-step tutorials, tool reviews, and tips for avoiding common mistakes. These visual guides can be invaluable for understanding complex processes before you attempt them yourself. Look for creators who explain not just the "how" but also the "why" behind building techniques to develop a deeper understanding.
Hands-On Learning Opportunities
Watching videos is one thing, but there’s no substitute for real-world experience. A fantastic way to get your hands dirty is to contact your local Habitat for Humanity. They offer volunteer opportunities to help build homes for families in your community. Under the guidance of experienced leaders, you can gain practical skills in a supportive environment. This not only prepares you for your own project but also allows you to contribute to a wonderful cause. It’s a win-win that builds both your skills and your community.
Be Realistic About the Time Commitment
Perhaps the most critical factor in a successful DIY build is a realistic timeline. This is not a project you can complete in a few months of weekends. As one DIYer on Reddit noted, you should expect to spend at least a year just learning and planning before you even break ground. The build itself is a huge commitment of your time and will likely take years to complete, especially if you’re balancing it with a full-time job and family life. Be honest with yourself about the sacrifices required and make sure you have the passion and perseverance to see it through to the end.
How to build a house
As you can see, there are lots of steps to building a house. But hopefully, after reading this guide you have a better idea of how to build a house and what’s involved in a house-building project. Armed with this knowledge, we hope you feel ready to start work on your own home.

10 Home Addition Ideas to Add Square Footage

Home Addition Ideas & What You’ll Pay for Them
Building a house for beginners: FAQs
How much does it cost to build a house?
According to the latest National Association of Home Builders (NAHB) construction cost survey, it costs an average of $392,241 to build a home. Take a look at our house building cost breakdown for more information.
How long does it take to build a house?
Depending on the size and complexity of your new home, building a house takes between six months to nine months. This timeline includes:
Site preparation and foundation
Framing
Installation of power and water
Insulation
Drywall and exterior finishes
Interior trim and exterior fixtures
Flooring and countertops
Mechanical trim and bathroom fixtures
Decorative elements, including flooring and landscaping
Final walkthrough
Is it cheaper to build a house or buy one?
Building a house can be up to $70,000 cheaper than buying one. However, it’s important to make careful calculations. Check out our post — Is it cheaper to build or buy a house? — for more information.
What is the cheapest way to build a house?
The cheapest way to build a house is by opting for a one-story ranch-style home, built on a slab foundation with a simple roof design. Here are some other ways to keep the cost of your house-build down.
Can you build a home in a container?
Absolutely. Container homes can be an eco-friendly and cost-effective way to build a home. If you’re wondering how to build a home in a container, take a look at our blog post: Everything you need to know about container homes.
This post was originally published on 2023-05-15 by Ryan Crownholm. It was updated on 2024-05-08 to reflect the most recent data.
About the author

Ryan Crownholm
Ryan is a construction technology founder and former contractor with 15 years of hands on experience in residential and commercial construction. He has been creating site plans for more than 25 years, supporting tens of thousands of homeowners and contractors across the United States. As the founder of MySitePlan.com, his work is grounded in real world permitting requirements, plan review feedback, and practical compliance standards used by local building departments.
Key Takeaways
- Solidify your plan before breaking ground: The most critical work happens before construction begins. This means setting a realistic budget, performing thorough due diligence on your land with a professional site plan, and carefully assembling your build team.
- Understand the construction sequence: Building a house is a methodical process where each step builds directly on the last. Knowing the order of operations, from foundation and framing to installing systems and finishes, helps you manage expectations and follow the project's progress.
- Manage your budget with smart choices: Your final cost is shaped by your decisions and unexpected events. Protect your finances by including a 15-20% contingency fund for surprises and by being strategic about where you splurge on materials versus where you can save.
