

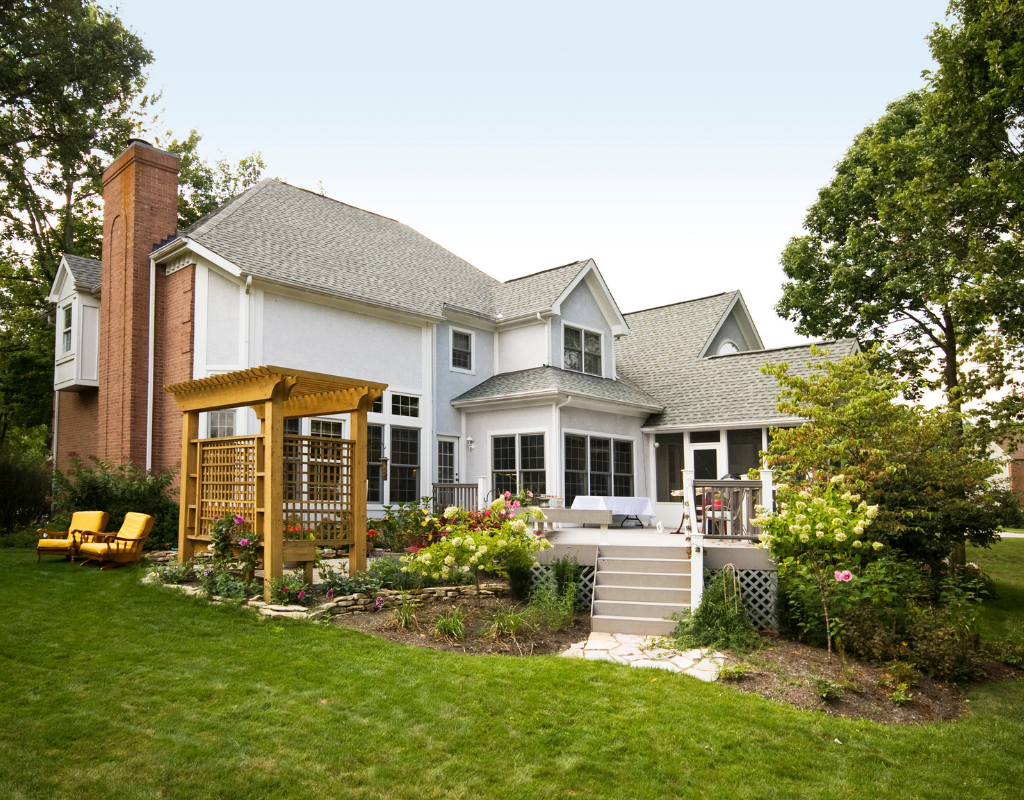
That dream patio or lush garden you've been picturing won't build itself. And starting a project without a map is a recipe for headaches. Before you break ground, you need to know your property’s exact layout. Where are the utility lines? How big is the space really? And most importantly, where does your yard end and your neighbor's begin? To answer these questions and bring your vision to life, you’ll need to draw a landscape plan. It’s your essential blueprint, ensuring your project fits perfectly without any costly surprises down the road.
Drawing a landscape plan can be complicated, so if you’re embarking on a larger-scale project, like adding a swimming pool to your backyard, you’ll most likely want to hire a professional. However, if you’re working on a smaller project, like adding new flowerbeds, you may be able to draw your own functional landscape plan. Here’s what you’ll need to do.
Locate your property’s site plan.
In order to draw a landscape plan, you’re going to need to know the size and scale of your property. You can find this information on your property’s site plan, which may have come with the deed when you purchased your home. If you can’t locate your site plan, or if you believe your site plan is out of date, you’ll need to order a new one.
If you custom order a site plan, you can actually skip the next two steps and simply create your landscape plan by laying tracing paper over the site plan and sketching in the new features you want to add (drawn to scale).
Decide on a scale.
The best way to start a landscape plan is to purchase graph paper and select a scale. For example, you might say the one square on the graph paper represents one square foot of your property.
Performing a Site Analysis
Before you start sketching garden beds or planning a new patio, you need to get to know your yard on a deeper level. This is where a site analysis comes in. Think of it as the diagnostic phase of your project—it’s the process of observing and recording your property’s specific characteristics, challenges, and assets. A thorough analysis helps you work with your landscape instead of against it, which saves you time, money, and the frustration of watching new plants struggle. It’s a critical step that turns a generic yard into a personalized outdoor space that truly works for you and your home.
Your property’s site plan provides the essential framework for this process, giving you the dimensions and layout of your property lines, house, and other permanent structures. The site analysis builds on that foundation by adding layers of crucial information, like soil quality and wind direction. By combining the hard data from your site plan with on-the-ground observations from your analysis, you create a complete picture of your property. This holistic view will guide every decision you make, from where to plant a tree to the best location for a new deck.
Map Your Yard's Conditions
The first practical step of your analysis is to map out the specific conditions of your yard. Before you place anything, you need to understand the site, including the weather patterns, how much sun different areas get, and the existing conditions of the land. Grab a notebook and walk your property, taking detailed notes on what you find. Pay attention to the microclimates in different corners of your yard. Note where the wind is strongest, which areas stay damp after it rains, and what kind of soil you have. This foundational knowledge will guide your choices in plant selection and placement, ensuring your landscape thrives.
Track Sun and Shade Movement
One of the most important parts of your site analysis is tracking how sunlight moves across your property. You’ll want to map areas with full sun, partial shade, and full shade. The easiest way to do this is to sketch a simple outline of your yard and observe it at different times—once in the morning, again at midday, and finally in the late afternoon. Use shading to mark where the shadows fall during each observation. This simple "sun map" is an invaluable tool when it’s time to select plants, as it ensures you’re choosing species that will receive the amount of light they need to flourish.
Note Problem Areas and Key Views
As you analyze your yard, you should also identify areas that need privacy screening or have good views you want to highlight. This is where you start thinking about how your landscape can better suit your lifestyle. Walk around your property and consider what you’d like to change. Is there an unsightly air conditioning unit you want to hide or a spot where you feel too exposed to the neighbors? Make a note of it. At the same time, identify the best features of your yard. Pinpoint the perfect spot to watch the sunset or the view from your kitchen window that you want to enhance. This helps you create a landscape that solves problems while celebrating your property’s best assets.
Measure your property.
If you don’t have an up-to-date site plan, you’ll need to measure the length of all your property borders, and then measure your house as well as the distance between the house and the boundaries on all sides. You’ll also need to measure any other elements on your property, such as a patio or a pathway, in relation to the house and boundaries. Use at least two fixed points of reference when measuring all elements in order to get a more accurate plan. Once you’ve recorded all your measurements, you’ll be able to draw all the features to scale on your graph paper.
Create a Detailed Base Map
With your measurements and scale in hand, it’s time to create your base map. This is essentially a bird's-eye view of your property as it currently exists, drawn to scale on your graph paper. Your base map should include the outline of your house, property lines, and any permanent features like a driveway, walkway, patio, or large trees. Think of it as the foundational layer of your landscape design. If measuring and drawing everything from scratch sounds like a lot of work, you're not alone. A great shortcut is to start with a professionally drafted site plan. This gives you a clean, to-scale foundation, so you can jump right into the fun part: designing your new landscape without the hassle of measuring every single corner of your yard yourself.
Mark Doors, Windows, and Utilities
Now, let’s add the details that will influence your design choices. On your base map, carefully mark the locations of all doors and windows on your home’s exterior. This helps you plan for views and access points. You don’t want to accidentally plant a fast-growing shrub that will block your kitchen window in a few years! Next, add other fixed elements like your air conditioning unit, outdoor water spigots, utility meters, and any visible utility boxes or poles. Knowing where these are is crucial for avoiding them when you start digging. It ensures your beautiful new garden bed doesn’t interfere with essential home functions or access for utility workers.
Make Copies for Sketching
Once your base map is complete with all the existing features and utilities marked, take a moment to clean it up. Erase any stray pencil marks or smudges to make sure the drawing is clear and easy to read. This clean, detailed drawing is your master copy. Before you even think about sketching a single flower, take your base map to a printer and make several copies. This is one of the most helpful tips I can give you! It allows you to experiment freely with different layouts and ideas on the copies without ever touching your original. You can try out a curved pathway on one copy and a geometric patio on another, letting your creativity flow without the fear of making a mistake.
Add bubble diagrams.
Once you have your initial landscape plan, whether it’s the one you drew on graph paper or the site plan you ordered, lay your graph paper over the top and add “bubble diagrams”. This involves drawing circles or ovals in any currently free space on your property and designating it for a certain purpose, such as “gazebo” or “planting bed”. Make sure you leave some space to navigate between these bubbles—you don’t want your yard to be too crowded!
Develop Multiple Concepts
Your bubble diagram is a great map for what you want, but now it’s time to figure out the where. While it’s tempting to run with your first idea, exploring a few different arrangements is a smart move that can lead to a more functional design. This is where you can really start to visualize how your space will work. Grab some tracing paper and lay it over your base map or site plan. Sketch out one potential layout for your garden beds, patio, and walkways. Then, grab a fresh sheet and try another. This iterative process lets you experiment with different flows and configurations without committing too early. You might find that shifting a pathway just a few feet opens up a perfect spot for a bench. Many designers use a similar hand-drawn garden design process to refine their ideas, making small changes with each layer until the plan feels just right.
Use your bubble diagrams to determine the space available for your landscaping projects.
Keeping the scale of your plan in mind, work out how many square feet you’ll need for each feature that you plan on adding. Again, if you’re planning to add larger features, it’s advisable to work with a professional landscaper.
Save yourself several steps in the landscape planning process by ordering a professional site plan from MySitePlan. We’ll provide you with an up-to-date and detailed plot plan in two working days or less.
Helpful Tools and Professional Drawing Techniques
Once you have your base map, you can start bringing your vision to life. You don’t need to be a professional artist to create a clear and effective landscape plan. With a few simple tools and some classic drafting techniques, you can produce a drawing that looks polished and is easy for you, your family, or a contractor to follow. These methods help organize your ideas and present them in a way that clearly communicates your plan for the space, turning your creative thoughts into an actionable guide for your outdoor project.
Gather Your Drawing Materials
Having the right supplies on hand makes the entire process smoother and more enjoyable. You don’t need a full-blown drafting table, but a few key items will make a significant difference in the quality of your final plan. Start with the basics: a mechanical pencil for clean lines, a good eraser that won’t smudge your work, and a set of colored pencils for adding detail later. An architect's scale or a simple ruler will also be essential for keeping everything proportional. Investing in a small set of quality materials is a great first step toward a professional-looking result.
Use Blue-Lined Graph Paper
Graph paper is your best friend for drawing to scale. The grid makes it easy to translate your property’s measurements onto paper—for example, letting one square equal one square foot. Opt for graph paper with light blue lines if you can find it. These non-photo blue lines are a classic tool in drafting because they tend to disappear when you photocopy or scan your drawing, leaving you with a clean, professional-looking plan without the distracting grid in the background. This small detail can make your final design look much more refined and easier to read.
Find Simple Drawing Aids
You can create clean, consistent shapes without needing perfect freehand skills by using a few simple drawing aids. A circle template is incredibly helpful for drawing perfectly round trees, shrubs, and other circular features. For creating smooth, curved lines for pathways or garden bed edges, a set of French curves can be a game-changer. These inexpensive plastic tools provide a variety of arcs and spirals, allowing you to draw organic shapes with precision and ease, which is much better than trying to sketch them by hand and feeling frustrated with the results.
Consider a Light Board for Tracing
If you plan on creating multiple versions of your design, a light board (or lightbox) is an excellent investment. This tool illuminates your paper from behind, making it easy to trace over your base map or previous drafts. It saves you from having to redraw your entire property layout every time you want to try a new idea. You can simply lay a fresh sheet of tracing paper on top and experiment freely. This is especially useful during the iterative design process, where you refine your ideas layer by layer without starting from scratch each time.
Use Layers for an Iterative Design Process
Great design rarely happens in a single attempt. Professionals often use an "iterative process," which involves refining ideas through multiple drafts. The easiest way to do this is by working in layers. Start with your base map—a detailed site plan showing your property lines and existing structures is the perfect foundation. Instead of drawing directly on it, lay a sheet of tracing paper over the top. This allows you to sketch out ideas, make mistakes, and try different layouts without ever touching your original base map. You can create as many versions as you like until you land on the perfect design.
Add Clarity with Visual Hierarchy
A good landscape plan is easy to read at a glance. You can achieve this by creating a visual hierarchy, which means making the most important elements stand out. Simple techniques like varying your line thickness and using color strategically can guide the eye and make the relationships between different parts of your design clear. This helps distinguish permanent structures from plants and pathways, preventing your plan from looking like a flat, confusing jumble of lines. It’s a simple way to add a professional touch to your drawing and ensure your ideas are understood.
Vary Line Thickness
One of the quickest ways to make your drawing look more professional is by using different line weights. Use a thick, bold pen for the most important outlines, like your house and property boundaries. Use a medium-weight line for hardscaping elements like patios and walkways. Finally, use a thin, light line for smaller details like individual plants or texture. This simple technique creates a sense of depth and makes it immediately clear which features are the most significant parts of your design, helping anyone reading the plan to grasp the layout quickly.
Color-Code Your Plan
Color is a powerful tool for communication. Assigning different colors to different types of features can make your plan much easier to understand. For example, you could use green for all plant life (softscape), a warm tone like brown or gray for hardscaping elements like decks and paths, and blue for water features. Using a consistent color scheme helps you and anyone else looking at the plan quickly identify different materials and zones, ensuring your design intent is perfectly clear and visually appealing.
Follow a Logical Drawing Order
To keep your process organized and your final drawing clean, it helps to build your plan in a specific order. Think of it as constructing your design in four main layers. Start with your base plan, which shows the fixed elements of your property. Next, use tracing paper over the base plan to sketch out your rough ideas and bubble diagrams. Once you've settled on a concept, place a clean sheet of vellum or more tracing paper over your sketch to draw the final, precise lines. The last step is to create the final colored version, often on a sturdy piece of bond paper, by tracing your finalized line work.
Use Simple Symbols and Add Dimension
You don’t need to draw every leaf and petal to represent plants. Using simple, standardized symbols will make your plan look clean, consistent, and easy to read. The goal is to communicate the type, size, and placement of plants, not to create a photorealistic portrait of your future garden. Once your symbols are in place, you can add a sense of depth and realism to your 2D plan with some simple shading techniques, making the entire design feel more dynamic and lifelike without being overly complicated.
Sketch Basic Shapes for Plants
To keep your plan from getting cluttered, use simple geometric shapes to represent different types of plants. Small, tight circles can represent perennials or groundcover. Larger, looser "cloud" shapes are great for shrubs. For trees, draw a circle to indicate the full size of the canopy at maturity and add a small dot or "x" in the center to mark the trunk's location. This symbolic approach is not only faster but also makes it easier for anyone reading the plan to understand your vision without getting lost in unnecessary detail.
Add Shadows for a Realistic Look
Adding shadows is a simple trick that can instantly make your 2D plan feel more three-dimensional. Decide on a single direction for your light source (for example, from the top right corner of the page) and add a small shadow to the opposite side of every object, including trees, shrubs, and structures. Use a light gray or black colored pencil to gently shade in the shadow. The key is consistency—as long as all the shadows fall in the same direction, your plan will have a convincing sense of depth and professionalism.
Your Plot Plan: The Foundation for Great Landscaping
Are you a weekend weed-eating warrior? A backyard garden guru? How about a professional landscaper still committing client plans to memory?
On the one hand, realizing a landscaping vision can seem a lot more time-consuming or difficult than the kind of project you can realistically commit to. Still, if you’re reading this article, you have to admit the lure of a lush green outdoor retreat likely has you toiling away regardless of the effort it takes this season... and on into the next.
On the other hand, perhaps you’ve made a life of landscaping. And your client list has become longer than the hours you have in a day. In this case, building your business means finding ways to work smarter — not harder. You may simply not be sure how to reclaim more of your time for continued net-positive growth.
In either case, a plot plan for your landscaping project may be exactly what you need. For those who don’t know, a plot plan is synonymous with a site plan, a sort of map of the exterior areas of a home.
Because plot plans are now so much more readily available - not to mention extremely cost-effective - those with a passion for creating beautiful outdoor spaces are more and more often turning to this easy-to-use planning solution to plot, design, and realize their (or their clients’) oasis dreams.
Related: Site Plan: Everything you need to know in 2019.
Why Do You Need A Plot Plan?

Unless you have no more than a postage stamp to maintain, a plot plan will simplify your landscaping scheme.
You likely know that projects of scale require some forethought. You need to know your property size and lines and where utilities lie before you start digging. You must have exact locations of existing flora and building structures to plan around them — or decide to take them out.
All of these things can be recorded and referred to in a single plot plan, which can make buying materials and getting the proper authorization to create your ‘scape less costly, while also saving you bundles of time. Let’s take a look at how...
Plot Plans Provide an Accurate, Scaled View of Your Property
Using an online site plan service like MySitePlan takes care of accurate scaling and perfect drawing, leaving the exciting stuff to you. Explain exactly what you need to be included in your plot plan, and you’ll be provided with an easier view of what works and what doesn’t. If you need changes, just mark the revisions you need and send it back.
The final output will be exactly what you need to confidently proceed on your landscaping project!
Related: MySitePlan.com: A Quickstart Guide to Your Custom Site Plan.
This Quality Plan Is Accepted by Your Municipality
Most municipalities have some requirements for landscape project permitting. Generally, they relate to certain structural dimensions (like retaining walls or decking) and their effects on water retention and run-off. While permits can take months to secure, providing professional-quality plot plans that note all prerequisites can ensure swift processing and approval.
What’s more, you can even put a stop to encroaching neighbor projects by presenting your plan as evidence for an official complaint to the city.
Collaborating with Clients or Other Professionals Has Never Been Easier
Finally, when you run into a snag with your personal landscaping plan, or as a landscaper need to share a client’s ongoing vision with collaborative partners, you have your plot plan on hand. With a quick print, you can ensure everyone involved is on the same page.
MySitePlan currently offers three different types of plans at a fraction of the cost you would pay for the average land surveyor. Whether you’re planning a combination of raised beds and swales to grow your own food, creating a resort-style backyard retreat, or dealing with a neighbor’s fence posts on your side of the line, MySitePlan can help you quickly and professionally resolve the issue.
Determine Your Goals for the Landscape Project

First, you should know why you are making these changes. A few examples of reasons people undertake landscaping projects include:
- To increase the value of their property.
- To create a play area for their children.
- To get protection from the wind or sun.
- To create an area for entertaining guests.
- To gain privacy from neighbors or streets.
You may actually have several goals for the project. If so, you should prioritize them. What’s most important to you? What’s least important?
Another goal that is key to determine upfront is your budget. What is the range you need to stay within? Over what period of time can you invest that money? If you have to make any sacrifices to stay within budget, remembering why you embarked on this project will help you make those decisions.
How to Create Your Initial Plot Plan
Developing your landscaping ideas used to require measuring each area of your property by pulling up your bootstraps and pulling out the measuring tape. Then you would record your measurements to incorporate them into your hand-drawn site plan.
Once all the measurements were taken (and retaken, because you should always “measure twice”), it was time to decide on the scale - one square box could equal one square foot, for instance. After that, you could finally begin blueprinting all the gathered info onto your graph paper pad.
This process takes so much more time than simply hiring a professional. And landscapers doing everything by hand are always at greater risk of encountering inaccuracies due to simple human error at execution time. These errors can cost both time and money.
Alternatively, you could purchase a plotting program. But the learning curve is often steep and time-consuming.
Instead, try the third option: hire a service that will professionally create the plot plan for you. The right site plan service will ultimately depend on your goals and needs.
You can either hire a surveyor to come out and measure your property for hundreds of dollars. Or you can utilize an online service that uses online data sources to draw up a plan. These services never even have to send anyone out to your home in order to accurately draw up the base-line blueprint of the area you intend to landscape.
At MySitePlan, we combine satellite imaging with GIS information, county parcel maps, and other public data to deliver our detailed site plans. If you have a survey or any sketches or ground measurements that you would like to include, we can certainly use those, too.
Our quickstart guide shares the basic steps for getting the process underway. The initial plan will always incorporate the following elements at minimum:
- Your home structure
- Property boundary lines
- Existing plants and fixed outdoor structures
- Outdoor utilities
- Existing irrigation systems
- Slopes/drainage areas
This layout becomes the base visual for realizing your (or your client’s) fully-developed landscaping plan. From here you can begin the creative work of determining what to keep and where changes or new additions should be made.
After that, you can annotate the additions you need to be included in the drawing, and one of our professional AutoCAD designers will add them to the plot plan. If you need any changes, you can simply note them and request revisions. When they are done, you will have a plot plan that accurately represents your ideas for that backyard oasis.
Related: How Site Plan Rendering Can Help You Convey a Breathtaking Property Design.
When to Hire MySitePlan to Create Your Plot Plan

Here are a few of the most common reasons our clients opt to use MySitePlan instead of utilizing other options for their site plans.
When You Want to Save Your Budget for the Actual Work
Hiring a landscape design firm or landscape architect is sometimes necessary -- when you have specific architectural home features that you are trying to align your design with or you have true engineering challenges to meet, like building retaining walls because you live on a cliff.
Otherwise, save yourself hundreds (sometimes even thousands of dollars!) when working through the initial planning and revisions by ordering a professional site plan from us.
When You Want a Little Technical Help
AutoCAD and other programs that produce accurate site plans take a significant investment of time to learn. Even if you have a basic proficiency, it may take you hours of work to create the site plan.
MySitePlan is a company full of AutoCAD designers who’ve had a lot of designs pass through their hands. We’ve worked on projects big and small. And we know AutoCAD inside and out. The end result is a professional plot plan — with more time for you to focus on making the project happen.
When You’d Rather Be in the Garden
You provide the details, and we’ll provide you with an initial blueprint plan in as little as 24 hours. If you need revisions, just make notes, and we’ll get a revised plan to you.
That way, you spend less time on the computer — and more time doing what you love in the garden!
Related: Best Plants for Paths and Patio Edges.
When You Don’t Need a Stamp or Seal Included
Although MySitePlan site plans do not come with a surveyor, architect, or engineer’s seal or stamp, our Auto CAD designers provide the deliverables you need in order to best explain your vision to these and other landscaping professionals.
They are also the plans you present for the permits required by your neighborhood and municipal development in situations where a certified plan isn’t required. This is often the case for landscaping projects.
At MySitePlan, we guarantee that your local building department will accept our plans as long as a stamp from a surveyor, architect, or engineer is not required. Our plans have been used to gain permits in cities and counties across the country.
Getting Creative with Your Diagrams
When creating a landscaping plan with MySitePlan, you can include details about the dimensions of features you want to be added, and where exactly they should be located. Or you can sketch them in after you receive a draft containing a plot plan for the existing structures and features.
You can quickly navigate through our services, pricing, and quote request pages from the menu bar on our MySitePlan home page. And our Help Center is great because even when your particular question isn’t listed on the FAQ section, there’s an in-site search bar where you can type your exact inquiry.
And we are always transparent about all of our options, so you never have to wonder whether a given feature might “cost extra.” Check out what landscapers like yourself are saying in our reviews section.
How the Process Works at MySitePlan

Using the MySitePlan Detailed Site Plan option as an example, during the basic process of plot planning, you’ve submitted everything you have, and the team has sent back a plot plan as the location looks know.
At this point, you can sketch in any required updates. This can include dimension corrections or missing items due to tree cover. And it can also include the landscaping items you envision for the project.
We have an extensive list of topographical, structural, and plantlife graphics that can be customized to scale for your planning. Simply add in what you need under the proper drop-down menu, and when you don’t see what you’re looking for, we’re here to guide you.
You send the revisions back to us to have the updates made. Once that happens, we’ll send you back your final plan, and you’ll be ready to get working.
If you require changes later in the project, it is still possible to reach out for further revisions. Your digital plans are archived for a specific period of time within our files.
Otherwise, you can always re-submit your current version as a base for the next phase you’d like to work on. Many begin by moving the earth around and getting base structures in.
Below is a sample of how someone might choose to move forward with their plot planning for their long-term landscaping goals for an entire property.
PHASE 1: Current Footprint
This is the digital file created through one of the three plot-planning options, all current structures, and existing landscape layout.
There is an option that appears after entering your address to “Add Topographical Lines.” Topographical updates can be made at the normal 2-5 foot intervals.
PHASE 2: Adding New Features
When placing your order, you’ll notice an option to “Add Non-Existing Feature”. You can select the number of non-existing features you need to be added here. Alternatively, you can ask for a custom quote for your specific project.
Again, you can specify what you need to be added right away in your initial instructions. But many prefer to sketch in the items after receiving the initial plot plan back. This is where you draw in your big vision for the project.
Perhaps you’d like to get the raised food garden beds in first so that you can cultivate your own food. Maybe you’d really like a section of native pollinators nearby shortly after. A water feature before the summer heat sets in? And of course, you need your wandering paths set before winter.
Whatever order best suits your landscaping dreams, you can break them up into as many new layers of planning as you please.
Although this list is in no way exhaustive, some of the most common additions we see include:
- Barns
- Sheds
- Fences
- Pergolas
- Patio covers
- Patios
- Paths
- Driveways
- Shrubs
- Lawns
- Trees
-
Water features
For each feature, you will have the option to either describe the dimensions of your newest feature and where you’d like it to be placed or simply sketch it onto a copy of your most recent draft. We will always work with you to ensure perfect placement.
Using Bubble Diagrams for Your Landscape Plot Plan

Bubble diagrams can be an effective way to see how your landscape ideas may fit in the space after you have the initial plot plan created.
Here is how it works:
- Lay graph paper over the plan.
- Draw circles or ovals (the “bubbles”) over free space on the property.
- Label these bubbles with what you envision filing them (e.g., gazebo, planting bed).
- Make sure there is ample space to navigate around and between bubbles.
- Adjust them accordingly to ensure your backyard has enough space.
- Measure the bubbles to see how much square footage will be taken up by each item.
- Use this information to order materials for your project accordingly.
Using a plot plan for landscaping can be an incredibly creative and rewarding experience. Choosing MySitePlan will help bring an element of professionalism to your landscaping discussion - whether you’re the landscaper or a client sitting down to discuss your dreams.
Our level of customer service - at a price point that makes sense - is unmatched. And the best part about it, we love what we do: helping folks like you put the foresight into making your landscaping projects a reality.
How to Draw a Landscape Plan From Scratch
The beautiful landscapes you see in home and garden magazines are attainable, but they don’t just occur by chance. Landscapers don’t just add trees, plants, and walkways at random; they carefully plan everything to make sure that they get the most out of the space they’re working with.
If you’ve been dreaming of making big changes to your backyard, the first thing you need to do is create a landscape plan. This plan should include:
- Your house
- Property boundaries
- Existing plants and outdoor structures, such as a pool or patio
- Outdoor utilities
- Existing irrigation systems
- Slopes/drainage areas
Your landscape plan will provide a great visual tool to determine where your new additions will lie in relation to existing structures. By carefully sketching out your landscaping ideas on your plan, you can ensure that you combine form and function in the best possible way for your home. Here are a few things to do to create a landscape plan that works for your project.
Determine the goal of your project. Are you hoping to add value to your home? Wanting to create a play area for your kids? Interested in adding trees to create a wind break? In many cases, you’ll probably have multiple goals for your landscaping project. By sitting down and articulating what you actually want to do, you’ll be able to start figuring out what changes to make.
Order a detailed site plan. Drawing your own landscape plan can be tricky and time-consuming—plus there’s a lot of room for error. In order to expedite the process and ensure that the plan is accurate, order a detailed plan that includes the landscape, trees, swimming pools, driveways, structures, and pathways. MySitePlan creates this type of plan using satellite imagery in combination with county parcel maps, allowing them to get your landscape plan to you within 2-3 business days.
Use tracing paper to sketch out ideas. Rather than drawing directly on your site plan, use tracing paper that you can place over the plan to sketch out the changes you’re interested in making. You may want to sketch out several different versions and allow your family to draw their own versions in order to do a comparison.
Keep logistics in mind. Before you finalize your landscaping plan, go over some of the logistics. For example, a willow tree that you plant now is going to be significantly larger in 20 years—is your yard large enough? If you’re adding a structure like a swimming pool, do you have the required permits to start construction? If your landscaping project does require construction, you’ll need to take a clean copy of your site plan to your city government to get a building permit.
Landscaping can be an incredibly rewarding experience… as long as you take the time to plan everything out ahead of time. Make sure that you’ve put some thought into your project and looked closely at your landscape plan so that you don’t have any unpleasant surprises when you start making changes.
| FAQ | Answer |
|---|---|
| What is the best season to start a landscaping project? | The best season typically depends on the climate and the type of plants. Spring and autumn are usually the most favorable due to cooler weather and more manageable soil. |
| How can I ensure that my landscaping plan aligns with local zoning laws and regulations? | Contact your local planning or building department for specific guidelines before beginning your project. This helps ensure compliance and avoid legal issues. |
| Can landscaping improve energy efficiency in my home? | Yes, strategic landscaping can improve energy efficiency. For example, trees providing shade can reduce cooling costs in summer, and evergreens can act as windbreaks to lower heating costs in winter. |
| What are the considerations for choosing plants based on my local climate? | Consider local climate zones, soil type, sun exposure, and water availability. Native plants are often best as they require less maintenance and adapt well to local conditions. |
| How often should I update my landscape plan? | It's advisable to review and update your landscape plan every 3 to 5 years to adjust for changes in property usage, plant growth, and personal preferences. |
| What are the benefits of using professional landscaping services over DIY projects? | Professionals offer expert design, plant selection, and installation. They can handle complex projects efficiently and deal with unexpected issues, potentially saving time and money. |
| How can I incorporate sustainable practices into my landscaping project? | Use native plants, install rain gardens, use organic mulches, and implement drip irrigation systems. Choose permeable materials for pathways and driveways to manage water runoff. |
Key Takeaways
- Start with a detailed base map: Before planning your new landscape, begin with a to-scale drawing of your property. Using a professionally drafted site plan provides a solid foundation and saves you from the tedious work of measuring everything yourself.
- Analyze your yard's unique conditions: A successful landscape works with your property, not against it. Take time to map out sun and shade patterns, identify problem areas, and note key views to ensure your design is both beautiful and functional for your specific space.
- Use simple drawing techniques for a clear plan: You don't need to be an artist to create an effective design. Use tracing paper to layer and refine your ideas, and apply simple methods like varying line thickness and color-coding to make your final plan easy for anyone to read and follow.
